Travel Tips
Photoshop and Pictures at Canada’s Ice Hotel
 Have you ever come home with a camera full of dull, washed-out travel pictures, despite a lovely destination?
Well, these days, getting great photos starts with taking the pictures—and then manipulating them digitally.
Pro shooter Rick Sammon shares his tips and tricks on using Photoshop to “defrost” his icy RAW photos.
Article and Photographs © Rick Sammon
Like most of my professional photographer friends, I enjoy a photographic challenge. Combine that with a Photoshop challenge, and I’m in digital imaging heaven!
My most recent challenge was a self-assignment to photograph the Ice Hotel (www.icehotel-canada.com) in Quebec, Canada, which is about a 30-minute cab ride from the airport. One of my goals was to get cool, new images for my Photoshop sessions at Photoshop World Convention.
At the hotel, my challenges included:
- photographing clear ice against a snow background
- getting detailed pictures of the soft ice and snow
- dealing with strong contrast between the elements in the scene
- shooting in the relatively tight conditions of the relatively small rooms
- getting colorful pictures of white subjects
- reducing reflections on the ice and snow, inside and outside of the hotel
- keeping my cameras warm so as not to lose battery power
- avoiding having people in my pictures, because I did not want to get model releases
- keeping myself warm
Before I go on, I am sure many of you want to know: “What was it like sleeping in the Ice Hotel?” Well, with no heat and a “mattress” placed over an ice slab, the rooms are literally frozen, especially at 2:30 a.m. when the outside temperature is below freezing. That’s why I stayed in the cozy lodge next door.
At the hotel, I shot with my Canon EOS 5D, keeping my four extra batteries warm inside of my coat.
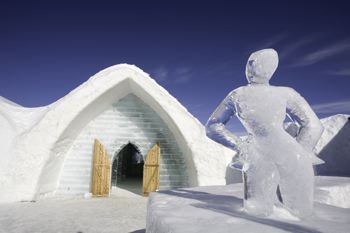 Outside, I used my Canon 17-40mm lens with a polarizing filter, which helped reduce the glare on the snow and ice. Inside, I used my Canon14mm lens, which let me get super-wide shots of the rooms.
After my shoot, in the comfort of my toasty lodge room, I downloaded my images and worked on, and played with, them in Photoshop.
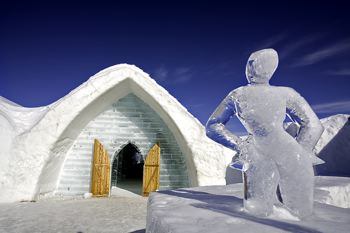 Above is the RAW file of the image, and following are the techniques I used to create the more dramatic image at right.
In Adobe Camera RAW, I reduced the Exposure, increased the Contrast and increased the Blacks. Then I used the new Vibrance control to add, that’s right, more vibrancy to the image.
My next step was to sharpen only the sky using Unsharp Mask.
 That was easy, thanks to the new Smart Filter feature (Filter > Convert for Smart Filters), which works like an adjustment layer and a layer mask—letting you selectively apply an effect to any area of an image.
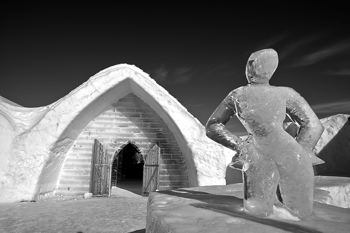
Speaking of dramatic, at right, here’s a black-and-white image I created in Photoshop’s Camera RAW.
Under the H tab, checked Convert to Grayscale and played around with the sliders.
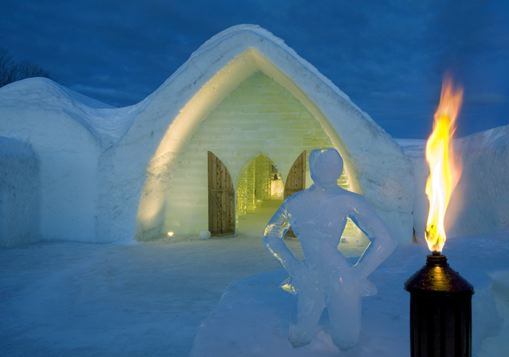
This is one of my favorite images from my Ice Hotel shoot. It’s the result of combining five images using Photoshop’s High Dynamic Range (File > Automatic > Merge to HRD) feature.
High Dynamic Range automatically combined all my exposures—each one at different brightness level in the scene—into an image that shows both the interior and exterior of the hotel, as well as some detail in the flame.
Now that’s cool!
For best HDR results, mount your camera on a tripod, use a cable release or the camera’s self-timer to further help prevent camera shake, shoot at a low ISO setting, reduce noise (in camera or in Camera RAW or other noise-reduction program), take more exposures at different settings than you think you’ll need (at least three), keep the aperture constant and adjust the exposure via the shutter speed, and choose a non-moving subject (although moving water may look nice).
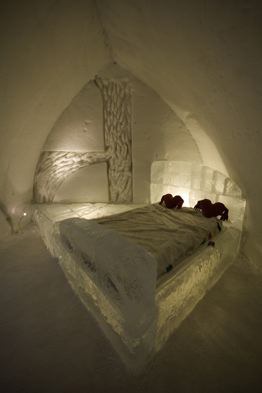 Looking at a picture of one of the Ice Hotel rooms, the dullest shot of this trio of images (at left), I decided to just have some fun and take some artistic liberty.
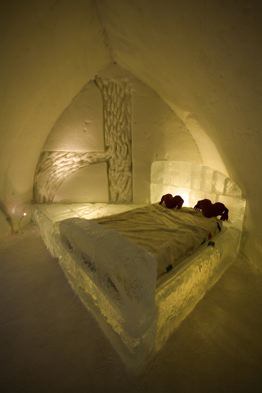 For the golden-tone image (at right), I increased the saturation (Layer > New Adjustment Layer > Hue Saturation) and boosted the Saturation to +44.
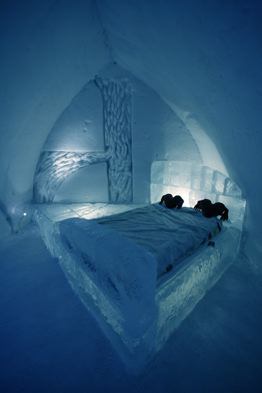 For the blue-tone, more romantic image (at left), I went back to my original image and boosted the Blue and Cyan tones (Layer > New Adjustment Layer > Color Balance) by moving the triangles on the sliders all the way to Cyan and Blue.
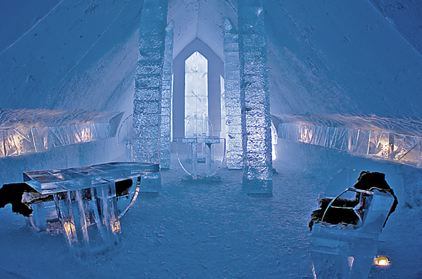
For the final images, pictures of the Ice Hotel’s church, I made almost all of my adjustments and enhancements in Camera RAW, including using the Straighten tool to level out the image.
Quite frankly, I was not interested in creating a true-to-color image.
Rather, I wanted to create a fantasy of what I thought the scene might look like had it been lit differently.
The original is on the left.
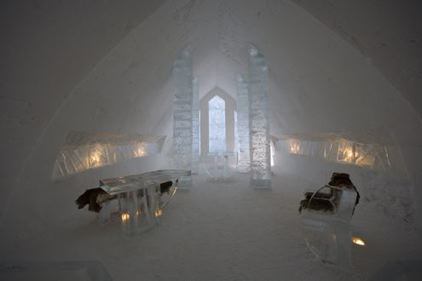 Under the B tab, I boosted the Contrast and Blacks, and then changed the Temperature (color temperature) to 4300, which cooled off the image, color temperature wise.
While still under the B tab, I boosted the Saturation and Vibrance just a bit. Under the D tab, I boosted the Sharpening to 100, and set the Luminance and Color noise sliders to 30, because I have found that boosting them more can make a picture look mushy.
 If you look closely, you’ll see that the enhanced image, at right, looks as though I used a 15mm fisheye lens, rather than the 14mm lens that I actually used. I created the warped effect by using Photoshop’s Warp feature (Select All and then Edit > Transform > Warp and then pull out on the left and right anchor points.)
For me, as a travel photographer, photography is a 50-50 deal: 50 percent image capture and 50 percent digital darkroom work. When you shoot, always keep the end result that you want—and Photoshop—in mind.
By Rick Sammon for PeterGreenberg.com. Rick Sammon, a Photoshop guru and professional photographer, has published 31 photography and nature books. See www.ricksammon.com for more information.
Want to see more of Rick’s work? Here are more slideshows packed with tips and tricks of the photography trade…


